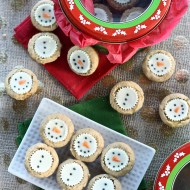
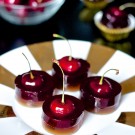
Erica’s Sweet Tooth turns 3 years old today! And as a celebration I’m launching this brand spanking new blog design made possible by the creative genius of Lindsay from Purr Design. We’ve been working together for the past few months to help make the blog more streamlined, organized, and very pretty too :). I hope you agree that the site has the same fun and cutesy vibe of the former Sweet Tooth, but just modernized a bit with some new features that should make things more user-friendly. Please take some time to explore the new site and enjoy the updated recipe index with pictures, the new recipe features within each post along with a “Print” button, the more prominent search bar and social media buttons, and so much more! I’m still working on manually updating each post (188 in total!) to make sure they all display the fancy new recipe feature but hopefully soon everything will be complete and fully functional. To celebrate all of this, I’ve made some incredibly cute birthday present surprise cookies full of so much color (and candy) so there’s no guessing they’re fit for a special birthday party.

Every year my blogoversary falls just one week shy of my brother’s birthday, so this year I had the cookies serve double duty and also gave them to Scott as an early birthday treat. If you’ve been following this blog from the early days (it was actually my 3rd post ever), you’ll remember the Skittles Cake I made him when he turned 17. He might be a few years older, but he certainly doesn’t love those chewy candies any less. This year I thought of another form to feature his favorite candy in a colorful and festive way. I think by slowly giving him birthday desserts and presents over the next week I’ll eventually come to terms with the fact that he’s turning TWENTY this year. As in 2-0, as in no longer a teenager, no longer a little kid (but still my baby brother of course). Excuse me while I go sob. Or eat my weight in leftover cookie scraps – either one, maybe both!

These cookies might seem complicated, but there’s really not much to them other than a little assembly time. By baking dyed sugar cookie dough in square shapes, I was able to cut out circles in the baked cookies, and then make coordinating stacks so they created little containers for the candy. I used melted white chocolate to help “glue” the layers together, and left the top square loose to make for easy opening. Tied off with Twizzler Pull&Peels, they’re completely edible presents with a sweet surprise inside. Scotty can share these with his friends at his birthday party this week (if he chooses to be so generous) and I get to share them with you today as a blogoversary celebration treat.

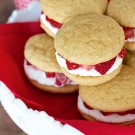
One of my favorite things to share on the blog over the past 3 years has been creative recipes that are visually appealing and inspiring, as well as tasty. Some of my favorites that epitomize this would have to be the Tooth Cookies and Peanut Butter and Jelly Cookie Sandwiches. I LOVE having this blog as my creative outlet during this crazy busy time of my life, and the best part is the feedback from all of you. You may not get to taste everything I make, but your 2, 602 comments have certainly kept me motivated. It’s been such a pleasure baking, photographing, and sharing my thoughts with all of you the past 3 years, and I plan to keep this thing going as long as it continues to bring me such joy. Sometimes life gets busy (like leaving for Europe tomorrow, ahem), but I know the hard work I put into this blog is always worth it. Because who else would give you sugar cookies dyed rainbow colors, stacked on top of each other, filled with Skittles, and tied with a Twizzler bow on a Tuesday morning?? It’s a job I don’t take lightly, and I’m SO happy to do it each week!
Birthday Present Surprise Sugar Cookies
Yield: 8 cookie birthday presents
Ingredients:
1 batch sugar cookie dough (my favorite recipe found here)
Food coloring
Flour, for dusting
1/2 cup white chocolate chips
1 large bag of Skittles (or candy of your choice)
1 package of Twizzler Pull&Peels
Directions:
Prepare sugar cookie dough according to recipe's instructions. Divide finished dough into 5 equal parts and dye each a different color (I chose to go with Skittles colros) - but you could do anything! Wrap each colored dough in a separate sheet of plastic wrap and chill in the fridge overnight.
Once dough is chilled, preheat oven to 350 degrees and prepare 2 cookie sheets with parchment paper or Silpat mats. Roll out dough onto a well-floured surface one color at a time and cut squares out of the dough. You can use a square cookie cutter or ruler to measure out equal pieces. Place cookies 1" apart on the cookie sheets and bake for 8-10 minutes, or until edges are just slightly browned.
Divide your baked cookies into groups that you wish to put together for stacks. I chose to keep my presents 6 cookies high - so for example I put piles of 2 red, 1 orange, 1 yellow, 1 green, and 1 purple. The cookies can bake unevenly sometimes, so use a sharp knife to trim any cookies down so they're all the same size in each group.
Use a cookie cutter (doesn't matter if it's square, circle, heart, whatever) to cut holes in all the cookies that will not be on the bottom or top of the present stack (for the example above, leave the red cookies alone).
Melt the white chocolate in the microwave. Use a toothpick to dab a bit of white chocolate on the bottom of the cookies with holes to help the stacks stay together. Leave the top cookie unattached so it can be easily lifted to reveal the surprise inside.
Fill each "present" with Skittles and tie them off with Twizzlers. I attached the bows to each present with some leftover melted white chocolate.
Happy 3rd Birthday Erica’s Sweet Tooth!
Happy 20th (omg definitely still not used to that yet) Birthday Scotty!
xoxoxoxoxoxo


<3 the new design! <3 all you recipes! <3 the way you manage school and your life and this blog!!
I got to be the first one to comment!
Have a safe trip to Europe, enjoy your friend's wedding. Best of luck with graduation and getting hitched! and keep the posts coming :)
Truly ingenious. Never did I see these kind of candies being made or became a new idea for making tasty treats.
What a lovely idea – they are so cute, and I bet they taste amazing!
This is the cutest thing ever! So simple, I can’t believe I’ve never thought to try something like this. Love it!
Did you get inspiration from here?
http://www.sheknows.com/food-and-recipes/articles/958083/cinco-de-mayo-pinata-cookies
ok so wherever you got the inspiration from doesn’t matter-I <3 THESE!!! :)
I love the new design! I want one! I’m jealous. :-)
Nice spin on these below. Very cute
http://www.glorioustreats.com/2012/10/3-d-pumpkin-cookies-with-a-surprise-inside.html
So dang cute, you did a great job!
Hi Erica! May I ask how much did your web designer charge you for the blog revamp please? :) If it’s a sensitive issue, please do state a ballpark amount ? =) Your blog looks fantastic!
I started following your blog when I came across your anatomically correct tooth cupcakes ! I am a dentist in private practice since 1982, my daughter is also a dentist (2009) and practices part-time with me (she has 2 baby boys and her husband is a urology resident) Wishing you well as you finish dental school soon and your upcoming wedding! Hope you still find time to bake and blog!
@Looks Familiar. Yes! It looks like this was inspired by the pinata cookie featured on SheKnows.com.
What a fun idea! Featured them today on my site!
Superb Idea! loved it.:) Will try it sometime. Thanks for sharing.
WOW, what a fantastic yummy present! I’m so glad I found you, I’m your newest fan :) Michelle
These are so great!! Do you have to cut the cookies after they are baked of before?
I tried to make them but i failed :-)
tnx!
Erica — March 18th, 2013 @ 1:34 pm
Yes, I cut them out before baking, and then refined them after baking if they spread too much. I’m sorry they didn’t work out for you!!
Wow! So clever! I love skittles so I can’t wait to try ;-)
I loved these! I borrowed these for my gender reveal party! Except of course I used pink and blue for the cookies and then tied a question mark on the top instead of a bow, then used blue skittles for the surprise inside since we are expecting a lil boy! Everyone loved it! Thank you so much for all your great recipes! (:
What a cute idea! It’s unclear to me if I need to cut the circle out of the middle before or after I bake the squares, can you please let me know the order that will give me the best result?
Erica — September 26th, 2013 @ 4:44 pm
Hey Katherine – cut out the cirlces after they bake, but not too long after so they are soft enough. Hope this helps, good luck!
You’ve managed a first class post