Personally I love when food bloggers share their kitchens — it’s “where the magic happens” in our world, so I figured I would share my happy place today with all of you! Ryan and I have done as much as we can with our rental condo kitchen, which isn’t too shabby considering it has probably been rented to students for the last 30 years with minimal bare-bones improvements. The rest of the kitchen has white cabinets, white counter tops, and mostly white appliances, so I did my best to bring interest to the room with my “baking nook”. Here it is!

This whole kitchen was basically decorated with my yellow KitchenAid in mind, since we all know it is the star of the show, and yellow is the best color everrr. I went with blues and greens too in order to distract Ryan from the presence of more yellow in our apartment, and so far it’s been going pretty well. Opposite my baking cabinet is a collection of baking and cooking essentials: my favorite mixing bowl, cookbooks, a pizza peel, the microwave, and of course, a bottle of Jose Cuervo. Not to mention the jungle that has seemingly invaded our kitchen, but we have to take advantage of all the natural light we can get! With all this being said, the kitchen may not be my proudest interior decorating achievement (that award probably goes to the living room), but just being in this nook makes me so happy and excited to keep baking, I love it just the same. In the meantime I’ve been designing my dream kitchen in my head, it’s all ready for construction whenever my income is no longer negative!

A lot of the items in this area are Ikea purchases — the cabinet, the wall shelves and storage unit, as well as the canisters, baskets, and planter. Let’s just say Ryan was one busy builder last summer when we moved in! They might not be the highest quality items out there, but I scoured the internet for kitchen islands and microwave stands and kept coming back to these. I absolutely love my baking cabinet, it’s the perfect size with huge, deep shelves that store all of my odds-and-ends. I may or may not have another cabinet full of baking pans, cake stands, and mixing bowls, but that’s in another part of the kitchen so we’ll ignore it for now :) I’ve included this labeled picture just in case you’re curious what’s behind those big white doors!

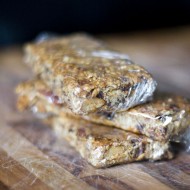
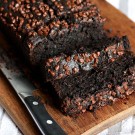
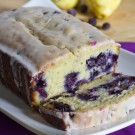
Now for any of you that were wondering about the canvas print hanging behind my mixer in the first picture, that’s a recent project of mine made from three of my photographs from different baking endeavors. I made the collage in Photoshop and played with the tones until it was muted enough, uploaded the image to a canvas-making website, and patiently waited for my masterpiece. It turned out just as I had hoped and I love how unique it is among a sea of common Ikea pieces. As far as the photos in the collage, the blueberry muffins can be found here, the layer cake is a variation of this one, and today I’m sharing the recipe for the homemade oreos. I wanted to make something that had a lot of contrast for the canvas, and so chocolate cookies with white filling came to mind. First off, let me say that these really don’t taste too much like oreos — the texture is spot on, and they’re super delicious, but they’re just not oreos. Crunchy chocolate sandwich cookies with white chocolate filling? Yes. But oreos? Sorry, not this time. This recipe is all over the blogosphere as “homemade oreos”, so I stuck with that title, but I don’t want to totally fool you here. Give the recipe a try anway, share them with a good friend, or just take a few pictures of them and slap them on your kitchen wall!

Recipe adapted from Tracey’s Culinary Adventures
For the cookies:
3/4 cup granulated sugar
1-1/2 cups all purpose flour + 3 tbsp
3/4 cup unsweetened cocoa (the good stuff!) + 1 tbsp
1/2 tsp baking soda
3/4 tsp salt**
15 tbsp unsalted butter, cut into 3/4″ cubes at room temperature
For the filling:
1/2 cup heavy cream
8 oz white chocolate, finely chopped
– Start by making the filling: in a small saucepan, bring the cream to a boil over medium heat. Remove from heat once boiling, and add the white chocolate. Let stand for 1 minutes, then whisk completely until all of the chocolate is melted.
– Transfer the filling to a small bowl and let stand for 6 hours, until it is thick enough to spread. (If it thickens too, just nuke it for 5 seconds)
– To make the cookies, preheat the oven to 350 degrees and line 2 baking sheets with parchment paper or a silpat mat.
– In the bowl of an electric mixer, combine the sugar, flour, cocoa powder, baking soda, and salt on low speed until well mixed. With the mixer still on low speed, add the butter a few pieces at a time until it is all in the bowl. (The dough will be sandy at first — but don’t worry, it comes together!)
– Once the dough comes together, transfer it to a lightly floured work surface and split the dough in half. Working with one half at a time, roll the dough out until it its 1/8″ thick.
– Use a 2″ round cookie cutter to cut rounds from the dough, and place them 1/2-1″ apart on the baking sheets.
– Bake for 12-15 minutes, rotating the baking sheets halfway through. Remove the baking sheets from the oven and let cookies cool on them for 4-5 minutes. Transfer to a wire rack and let cookies cool completely.
– Get the filling ready by whisking it to fluff it up and then transfer it to a disposable pastry bag to pipe about 1-1/2 tsp of filling in the center of each cookie. Top cookie half with another cookie and press gently until you can see filling on all edges.
Recipe yields about 24 sandwich cookies.
**I’ve halved the salt from the original recipe — I found the saltiness way too overpowering at first, so I altered my recipe to reflect this. If you love yourself a salty cookie, add another 3/4 tsp of salt, but I recommend the smaller amount!


I love your baking nook! I wanted to get a lime green kitchenaid, but went for the charcoal one cause who knows what color scheme I’ll want one I get my own place. I cannot wait to move out of my apt to somewhere with a kitchen actually made for someone who cooks every day. I would take pictures and share, but I think it might depress people haha.
I loved seeing your kitchen!! I currently live in a tiny 2 bedroom apt and my kitchen is seriously the tiniest place in the whole apt. I mean, seriously, one of my closets is bigger than my kitchen. Since I love to bake, I do get depressed about my limited space but I really loved seeing how you organized your areas, especially the cabinet full of baking supplies. Thanks so much for sharing!!
Oh my gosh I am in love with that ‘baking space’ I am so jealous! I wish I could organize like that.
Gosh, I love your kitchen! You’ve done an absolutely great job with it and making tons of storage space! Love, love, love your wall decorations as well, adorable!
I love your kitchen! especially the clean look of it! and i like that you didn’t use vegetable shortening for the oreos! cos that would be totally yucky :D
What a great post! I have kitchen envy now :)
So jealous of your kitchen. It’s fabulous!
You have a lovely kitchen! Mine is similar sized and I was actually about to buy that counter top from Ikea. I love your blog!
Brilliant kitchen! Love it, and very inspiring. Perhaps you should share this with: http://www.ikeahackers.net/ We would love to see it there!
Anonymous — February 19th, 2012 @ 1:46 pm
I recognized the cabinet from IKEA!
i love cupcakes sooooo much and i love your kitchen its cute!!!!
It is so nice to see that all these wonderful recipies come from a nice normal kitchen. We can all bake at home! I really like your well organized baking cabinet! Everything you need right at your findertips. What kind of a camera do you use? Is it something that would be good for everyday use or do you specialize in photography? Your pictures are amazing?
Erica — February 2nd, 2012 @ 4:29 pm
I use a Canon Rebel xsi – it’s definitely a nice camera, but not “top of the line”. It’s great for what I do but I also have a point-and-shoot for everyday use since the Rebel can be cumbersome to carry around.
I love your baking centre. In my kitchen reno I was planning a similar baking centre below a large window. I may just go the ikea route due to money constraints :) Do you take all your food photos on the counter top? By the way, the photos are gorgeous and I am gaining weight just looking at them :) Thanks for a great blog!
Hi Linda! I don’t take all of my photos on the counter because the light isn’t always that great in the kitchen – I take most of them on my coffee table, actually. Thanks for the comment, I’m glad you like my kitchen :)
I have the same exact free standing counter! Love it! And I love how you have added your personality to your baker’s corner. I am also in a condo and the kitchen is a good size but does not have very much storage so the added room in this counter is a huge help. It is definitely not ment as a “cooks kitchen” but I make due.
you really inspired me with the set up of your kitchen, i am waiting for my baking table to come. :) (especially your organization)!!!!
What a cozy organized kitchen. Thank you for sharing your space!
I love your kitchen and all of your recipes!!! Amazing!!! You should really open up a bakery!!!!
Thanks for sharing you kitchen pics I love to see other people’s spaces too. I’ve got a good article about butter cake recipe ratio’s you might be interested in: http://cookingsmartathome.blogspot.com/2012/05/cake-ratios-and-butter-cake-hints.html
Also, about the oreos – I read something about the black cocoa on this site that might interest you.
http://projectdomestication.blogspot.com/2010/10/what-is-black-cocoa-powder.html
Since you bake a lot have you tried Pensey’s Vanilla extract? It’s awesome. Their website isn’t much to look at but the prices are very reasonable for the quality. If you sign up for their catalog you get a free coupon for a full sized spice when they have a new product. I don’t work for them or anything, just a big fan of their seasonings.
http://www.penzeys.com/cgi-bin/penzeys/p-penzeyssinglestrengthvanilla.html
Thanks so much for your blog, just stumbled upon it by accident, I am not a sweet tooth but my girlfriend will love it (I am the one cooking ;)). I have nothing to say else than keep it up :D A question though, what is the name of the appliances you used for your baking spot? Thanks in advance, and if you and your boyfriend come down to Shanghai let me know and I will treat you to dinner :D
Just came across this post, you have inspired me to sort out my supplies and well all my baking stuff! And I’m going to say it again, LOVE YOUR BLOG!!
I love how neat you are. Wish I was organized. I also love that canvas. It seems so fun!
Wow – I like your kitchen very much and I have seen you have a KitchenAid – I love it. Are you happy with it, can it do every dough (what limits does it have and what about small amounts) ? I am considering buying one – but in Germany (where I live) they are really expensive. But for my baking amount – I really need it ;-)
Erica — December 11th, 2014 @ 7:58 am
I LOVE my KitchenAid. If you have a extremely thick dough the mixer may slow down a bit, but the motor on that thing is intense! I’m not sure about the specific limits, but I’m sure you could google that and figure out. As far as small amounts, sometimes I need to use a spatula to mix up the stuff on the bottom that the mixer missed, but I haven’t had any major problems. I think it’s a great investment and I definitely recommend it!